Authentication in Microsoft Azure via SAML 2.0 |
|
|
SE Suite has approved integrated authentication via SAML 2.0 on the Microsoft Azure platform. Microsoft Azure is a platform for running applications and services, based on the concepts of cloud computing. The concepts and the way authentication works on this platform are very similar to the template presented previously, differing only in the order of the exchange of the metadata files between the system and the service (for Azure, the SE Suite metadata file must first be generated). The following is how to configure authentication via SAML 2.0 in the Azure platform:
1.To configure the authentication of users via SAML, access Configuration
2.Select Authentication services
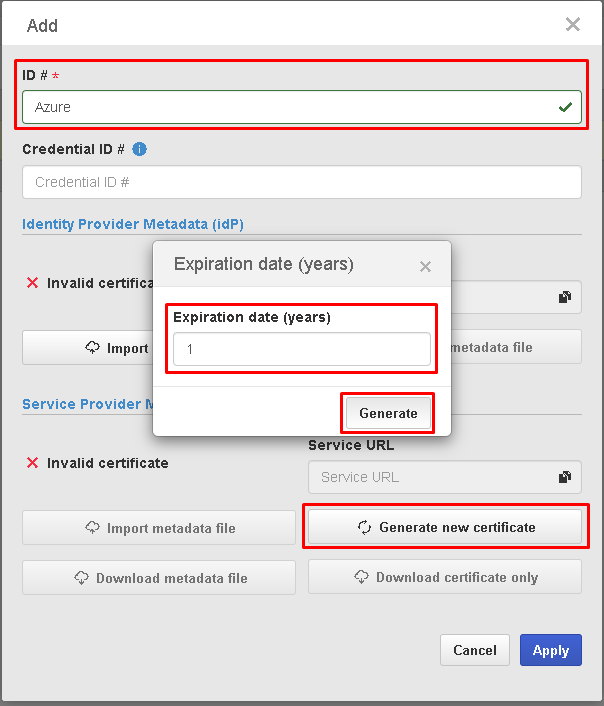
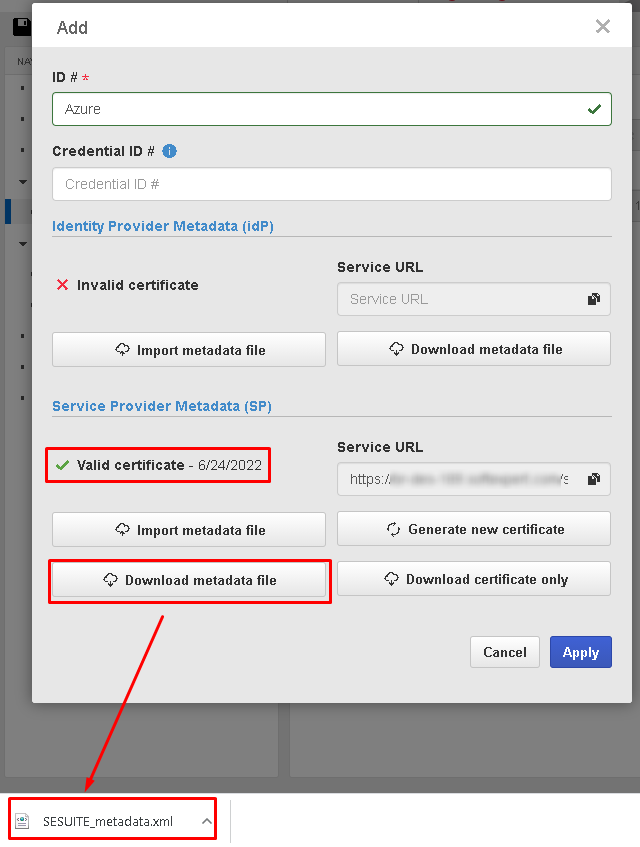
3.Still in Service Provider Metadata (SP), click on the Download metadata file button to download the metadata file. Save the configuration by clicking on Apply.
4.After that, access the Azure Active Directory platform and perform the configurations described below:
i.In Azure Active Directory, locate the enterprise application by clicking on the left side menu Enterprise applications; ii.Select All applications so that all recorded enterprise applications are listed; iii.Locate the enterprise application to which you wish to configure the SAML 2.0 authentication.
5.Select the enterprise application and, on the left side menu, access Single Sign-On and select the SAML method.
6.Then, click on Upload metadata file, load the “SESUITE_metadata.xml” metadata file that has been previously downloaded by SE Suite in the SAML 2.0 configuration screen, and add it by clicking on Add.
Note: If the file displays two identical URLs, it will be necessary to delete one of them and then save.
Once this is done, the Identifier (Entity ID), Reply URL (Assertion Consumer Service URL), and Logout Url fields in the "Basic SAML Configuration" section should be automatically filled out, ending in ".../softexpert/selogin", ".../softexpert/saml", and “.../softexpert/selogin/samlsso”, respectively.
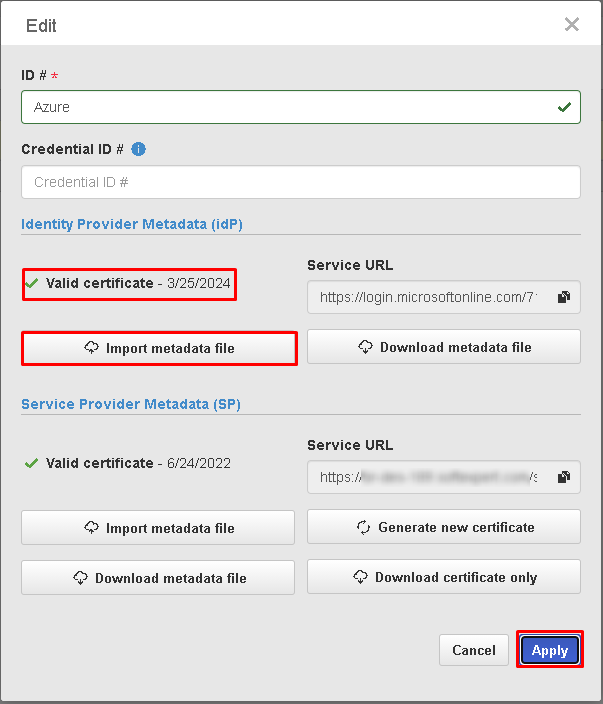
7.After the metadata file is loaded, click on the Download" link in the "SAML Signing Certificate" section, in "Federation Metadata XML", to download the configurations.
8.In SE Suite, access Configuration
9.Then, it is necessary to configure the attribute that will be used by Azure to authenticate via SAML 2.0 with the login of the user registered in SE Suite, in Single Sign-On.
By default, SE Suite uses the attribute configured in the Unique User Identifier (Name ID) claim name to authenticate users in Single Sign-On via SAML 2.0.
It is necessary to check if the attribute configured in the Unique User Identifier (Name ID) claim name is the same attribute used as login in user provisioning (LDAP, SCIM, Web Service, among others) or in manual user creation in SE Suite. If they are not the same, it is necessary to edit the attribute of this claim or create a new claim, and later configure it in the SAML 2.0 record in SE Suite.
To create a new claim in Azure, simply select the desired enterprise application, access the Single Sign-On menu in the enterprise application, locate the User Attributes & Claims section, and click on Edit. Then, click on the Add new claim button to add a new claim, enter the desired name for this new claim and select the desired attribute for it.
In SE Suite, to configure Single Sign-On for a new claim, it is necessary to enter the name of this new claim in the Credential ID field in the SAML 2.0 configuration.
|