Authentication in Okta via SAML 2.0 |
|
|
SE Suite is compatible with performing Single Sign-On with the Okta application. This application aims at facilitating the authentication for users to access SE Suite, making the login process faster.
To start the configuration, it is necessary to have an Okta access account, of which there are two types: Okta and Okta Preview. For authentication configuration, it is necessary to have the Okta Preview account.
1.With the Okta Preview account properly configured, access Okta. 2.Then, access the Directory 3.Click on the Add Directory
4.Click on the Download Agent button to download the agent. The downloaded agent must be installed in the AD server for it to communicate with Okta. Once the installation is done, it will be necessary to authenticate Okta within the AD server in which the agent is being installed.
5.Import the users to the Okta platform and confirm which users will have access to the Single Sign-On via Okta.
6.Once the Active Directory configuration in Okta and AD is done, the application that will perform the SE Suite login must be configured. To do that, access the Applications
7.Click on the Add application option to create a SAML application for the SE Suite authentication.
8.Then, click on the Create new app button.
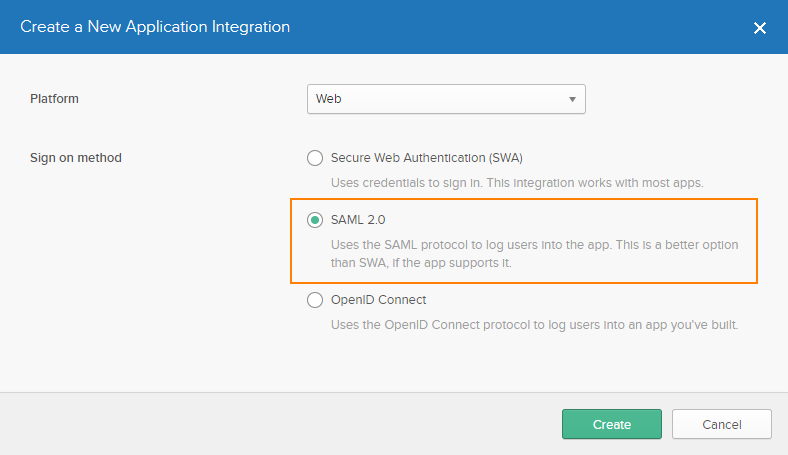
9.Once done, a new screen will be displayed, in which the type of app being created must be selected. Select the SAML 2.0 option and click on the Create button.
10. At this point, configurations must be performed in order for the application being created to communicate with SE Suite. These configurations are highly important! See how to perform them:
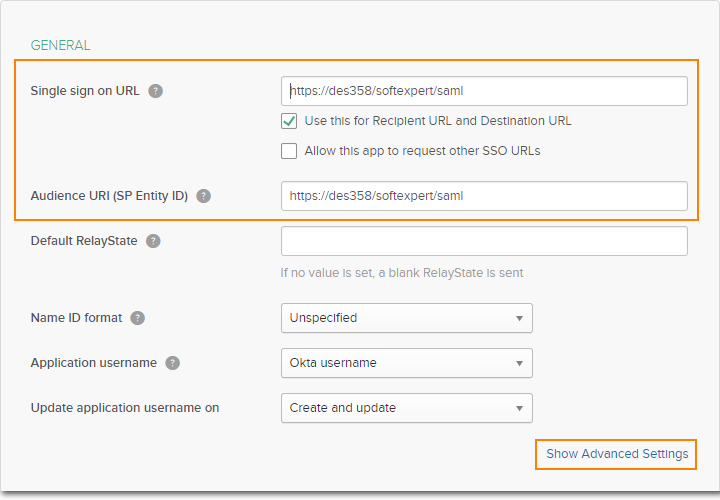
i.First, the URL that Okta will return to SE Suite must be entered. The SE Suite access URL must be entered, following this pattern:
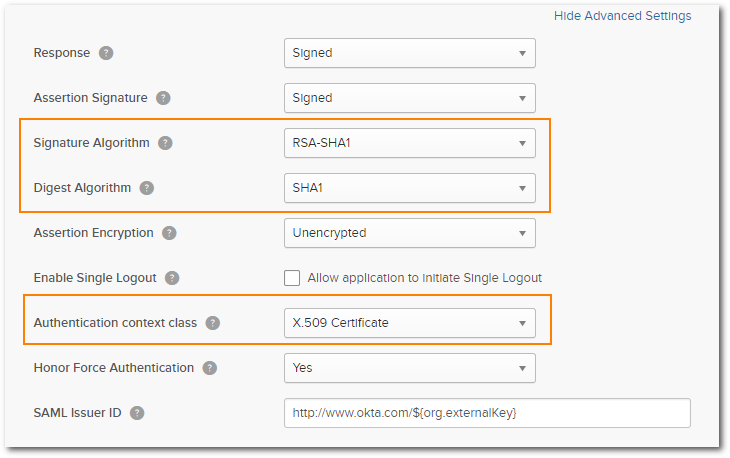
ii.After filling out the necessary fields, click on Show Advanced Settings. iii.On the screen that will be displayed, the fields must be filled out according to the following image, as the example displays the signature type supported by SE Suite:
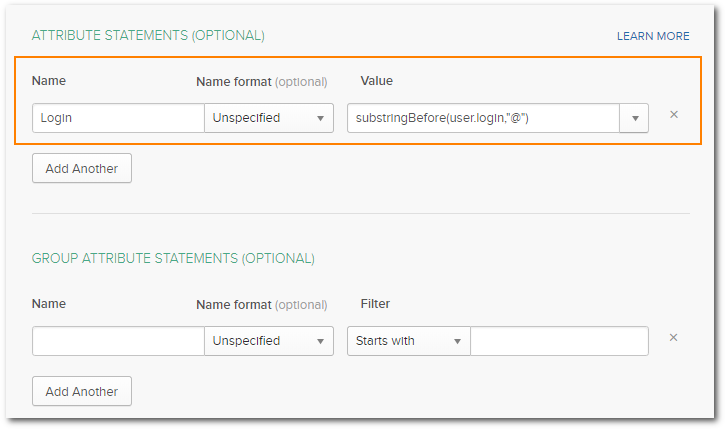
iv.Right below, the fields in the Attributes Statements (Optional) section must be according to what is displayed in the following image:
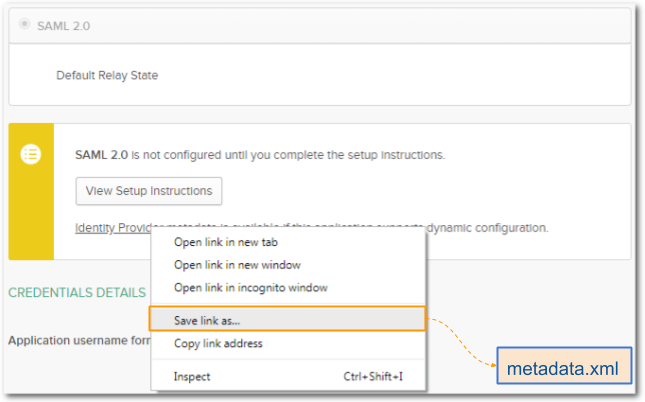
v.Once done, click on Next. vi.On the screen that will be displayed, simply click on Finish. vii.At this point, another configuration screen will be displayed. Right-click on the Identity Provider Metadata link, select the "Save link as..." option and define the file extension as .xml:
viii.For the user to be able to access SE Suite, it must be associated with Okta. To do that, access the Assignments option and click on Assign ix.On the screen that will be opened, locate the desired user and click on the Assign button.
x.Then, enter the SE Suite user login (for example: john.leader@contoso.local) and click on Save and Go Back. xi.The users that will have access to SE Suite will be listed on the screen of the Assignments option.
11. Once done, access SE Suite, in SE Configuration
12. After setting all necessary configurations, test the single sign-on via Okta. To perform this operation, log in to SE Suite by clicking on the "Single Sign-On" button from the login screen. |