|
To install the application, make sure all validations related to hardware and network requirements are performed, and the Windows Server is fully updated.
It is necessary to have admin permissions for the installation; otherwise, the execution cannot be performed correctly.
|
Thus, follow the steps below, copying and pasting the commands according to your system configurations:
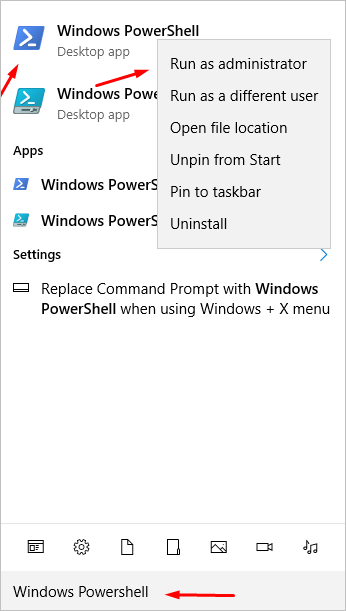
1.Open Windows PowerShell as admin. To do that, search for "Windows PowerShell" in the search bar and choose the option to run it as admin.
2.Run the following command to have full permission to run PowerShell scripts:
Set-ExecutionPolicy Unrestricted -Force
|
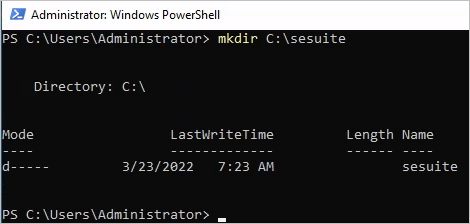
3.The SoftExpert Suite root folder will be created here. Edit it according to the disk in which it will be installed:
Or, if the installation is in disk D:
Example using disk C:\
4.Download the configuration files.
▪Downloading the configuration files in disk C:
Invoke-WebRequest -Uri 'https://dockerdocs.softexpert.com/_scripts/windows/docker-compose.yml' -OutFile 'C:\sesuite\docker-compose.yml'
Invoke-WebRequest -Uri 'https://dockerdocs.softexpert.com/_scripts/windows/sesuite.ps1' -OutFile 'C:\sesuite\sesuite.ps1'
|
▪Downloading the configuration files in disk D:
Invoke-WebRequest -Uri 'https://dockerdocs.softexpert.com/_scripts/windows/docker-compose.yml' -OutFile 'D:\sesuite\docker-compose.yml'
Invoke-WebRequest -Uri 'https://dockerdocs.softexpert.com/_scripts/windows/sesuite.ps1' -OutFile 'D:\sesuite\sesuite.ps1'
|
5.Execution of the script to install the application:
This step will enable some Windows dependencies, and it will be necessary to restart it; thus, it is essential to check if there are no important services or processes that may cause problems if the server is restarted.
▪It is MANDATORY for the antivirus to be disabled for the installation to be performed successfully; after this process, it can be enabled again. If this is not done, the installation will be subjected to failures during the execution. ▪Make sure all validations related to hardware and network requirements are performed, and the Windows Server is fully updated during the installation. ▪During this process, it will be necessary to restart the machine. ▪Make sure the server can be restarted, as any other services being executed in it will be affected by the restart. |
Run the installation script. Edit it according to the disk in which SoftExpert Suite is being installed: C:\ or D:.
The installation will download several dependencies. Then, it will be necessary to restart the machine; to do so, write "yes" on the console when requested and press Enter:
C:\sesuite\sesuite.ps1 install
|
Or, if the installation is using another disk, such as D:
D:\sesuite\sesuite.ps1 install
|

6.After restarting the machine, search for Windows PowerShell again, as previously described, and run the same script as the previous step. Remember to always edit it according to the installation disk:
C:\sesuite\sesuite.ps1 install
|
Or, if the installation is using another disk, such as D:
D:\sesuite\sesuite.ps1 install
|
7.Wait for the dependencies to be installed.
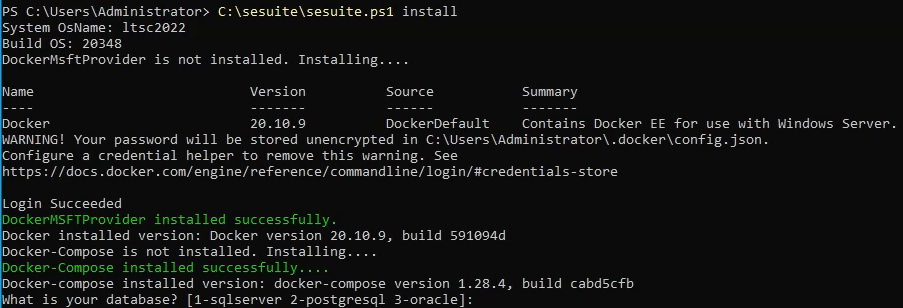
8.Enter the database connection configurations in the console when requested.
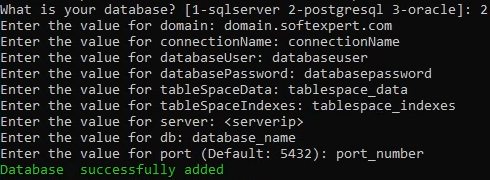
This database configuration is only an example. Moreover, during the port value configuration, if you wish to use the default value, simply press Enter, and the default value for the database will be used - for example: 5432, using PostgreSQL.
|
Perform the adjustment according to this configuration map:
Parameters
|
Acceptable parameters
|
Definition and usability
|
<autoCreate>
|
MANUAL
|
This parameter may not be modified.
|
<connectionName>
|
name
|
Name to be defined by the user, only to name the database in the file.
|
<databasePassword>
|
password
|
Password to access the database data.
|
<databaseUser>
|
user
|
User name to access the database data.
|
<db>
|
database_name
|
Database name, if existent.
|
<charset>
|
iso-8859-1
or
"Unicode"
|
Define whether the database will be iso or unicode.
Unicode should only be used for oracle and postgres databases.
The standard is iso-8859-1, and the database configurator validates this information.
|
<domain>
|
domain
|
Name of the domain in which SoftExpertSuite was installed.
|
<driver>
|
net.sourceforge.jtds.jdbc.Driver
or
oracle.jdbc.driver.OracleDriver
or
org.postgresql.Driver
|
Use:
▪net.sourceforge.jtds.jdbc.Driver to MSSQLServer; ▪oracle.jdbc.driver.OracleDriver to Oracle; and ▪org.postgresql.Driver for Postgresql |
<enable>
|
true
|
Leave it always as "true".
|
<encrypted>
|
false
|
For files written manually, always set the value of this parameter as "false". The configurator encrypts this file and changes this value.
|
<instance/>
|
|
Used for SQL Server database, when it contains instances. It is left empty by default.
|
<oraHome>
|
oracle_home
|
If using Oracle, add the oracle 64 bits installation location.
|
<port>
|
5432
or
1521
or
1433
|
By default, the ports are:
▪1433 for MSSQLServer; ▪5432 for Postgresql; ▪1521 for Oracle. However, if the connection port is another one, add the correct port.
|
<server>
|
server
|
Name of the database server.
|
<tableSpaceData>
|
tablespace_data
|
Postgresql and Oracle use tableSpaceData, check for it in the database.
|
<tableSpaceIndexes>
|
tablespace_indexes
|
Postgresql and Oracle use tableSpaceData, check for it in the database.
|
<tns>
|
tnsName
|
Enter the tns if the database is Oracle. Oracle Net Services is the tnsnames.ora file. In it, verify the tns name for connection with the database.
|
<allowedHosts>
|
host
|
Fill out the tag when it is necessary to limit the hosts with access permission in the SoftExpert Suite requests. If it is not entered, the requests will not be blocked.
|
In the domain field of the database configuration, it is not possible to use the hostname of the host machine or an IP address; a valid DNS must be used - for example: company.test.com
|
9.After the configuration for the database connection, you will be asked which SoftExpert Suite version will be used. If you press Enter, the installation script will use the latest installation version; however, if you wish to use a specific version, remember to add the points. SoftExpert Suite version example: 2.1.9.20.
10.Select the time zone according to the server configuration. Check which time zone applies according to the region of the server or the wishes of the client/system administrator. Open the Server Manager and search for the Time zone parameter.
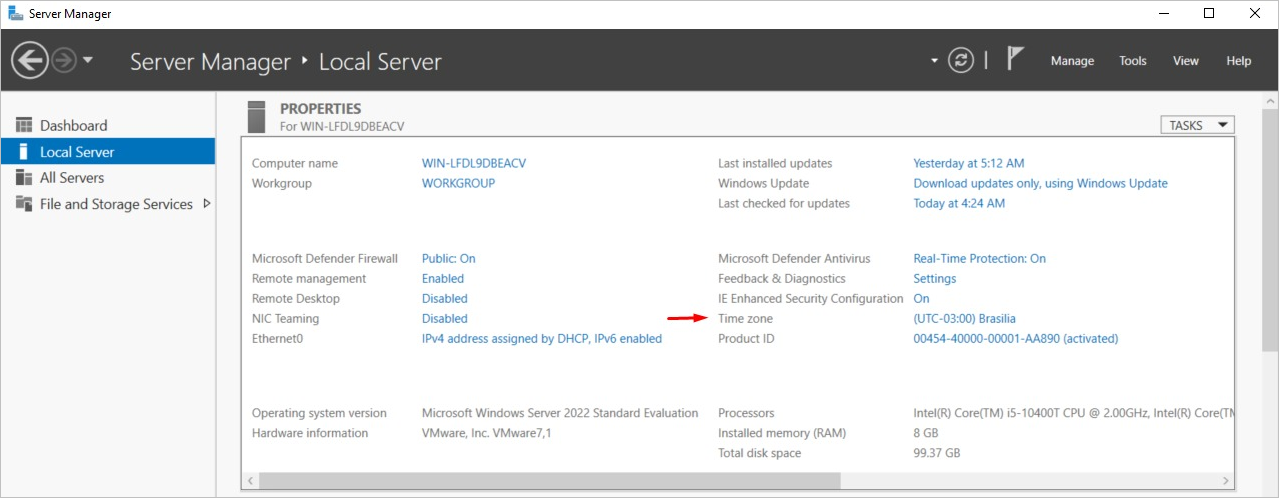
Once the time zone is validated, it will be possible to check which will be used in the TimeZoneDB website.
If you wish to use the America/Sao_Paulo default, simply press Enter.
11.Configure the amount of memory dedicated for the container and the number of processor cores to be divided for the container. If you wish to use the minimum for both, simply press Enter when requested.
Moreover, if you wish to use the SSC certificate or a customized self-signed certificate, press "y" to configure it.
IT IS RECOMMENDED TO USE THE CERTIFICATE.
Check in the Task Manager how many cores and how many GB of memory the server has. It is important to align this configuration with the system administrator and with the client, as it depends on how many users SoftExpert Suite will have and how much of the application will be used.
|
The installer will also ask whether you wish to use a private/internal DNS service. If there is an internal/private DNS server in your company, it will be necessary to enter its IP for the container to solve the domains of the other services in the local network. In this context, if you wish to configure the DNS server, simply select "y" and enter the server IP.
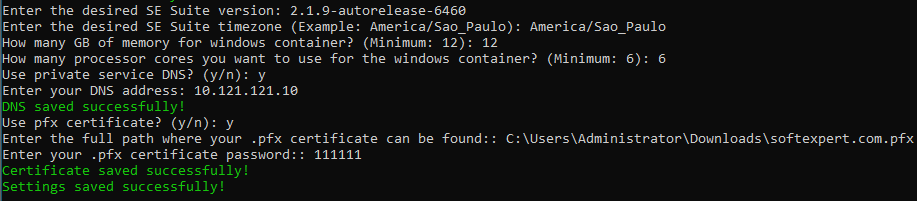
It is necessary to enter the full certificate path and the ".pfx" extension. The installation uses ".pfx" files only.
|
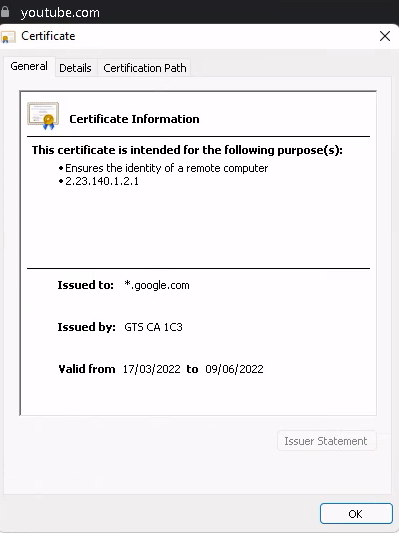
As previously mentioned, it is recommended to use an authentic digital certificate; in the case of a lack of authentic certificate, the installation provides a self-signed certificate for the application to work temporarily.
A digital certificate is a document that aims to ensure the encrypting of communication and connection to a website, as well as to validate its integrity. It is usually a padlock symbol on websites.
Youtube example:
|